CLICK HERE FOR FREE BLOG LAYOUTS, LINK BUTTONS AND MORE! »

Pages

Showing posts with label Mickey Mouse. Show all posts

Friday, September 14, 2012

MIckey Mouse/Under the Sea Party

This past weekend we threw a party for Maddi and Brayden.  It was a Mickey Mouse/Under the Sea party theme. 

The cake table
It was small and intimate, and ended up pretty great.

Maddi had invited the girls from class, and 3 of them showed up.  3 is fine with me, much better the than 11 that could have come!  

We also had Marco's aunt, uncle and cousin, and some of our friends and their kids over.  It was the perfect number of people for our first party in a new city.

We served sliders, chips and dips, and of course cake!!  I made Brayden's cupcakes to resemble Mickey, and Maddi's cupcakes to resemble ocean waves.  I think both turned out well, considering I seriously lack skills at cake decorating!

I did make a cake for Maddi, just to put all the candles and her Ariel figure on.
We didn't even cut it at the party.

Decorating was done on a tiny budget with most items coming from the Dollar Tree like the table cloth, candies, and some decor items. The most expensive trip was made to Party City to get the festive plates, napkins, and cups.

Brayden's Mickey table, had Twizzlers, red sour straws, Mickey cookie pops and cookies, black olives for Mickey noses (Ella ate most of them before the party), and smarties in a Mickey cake pan.

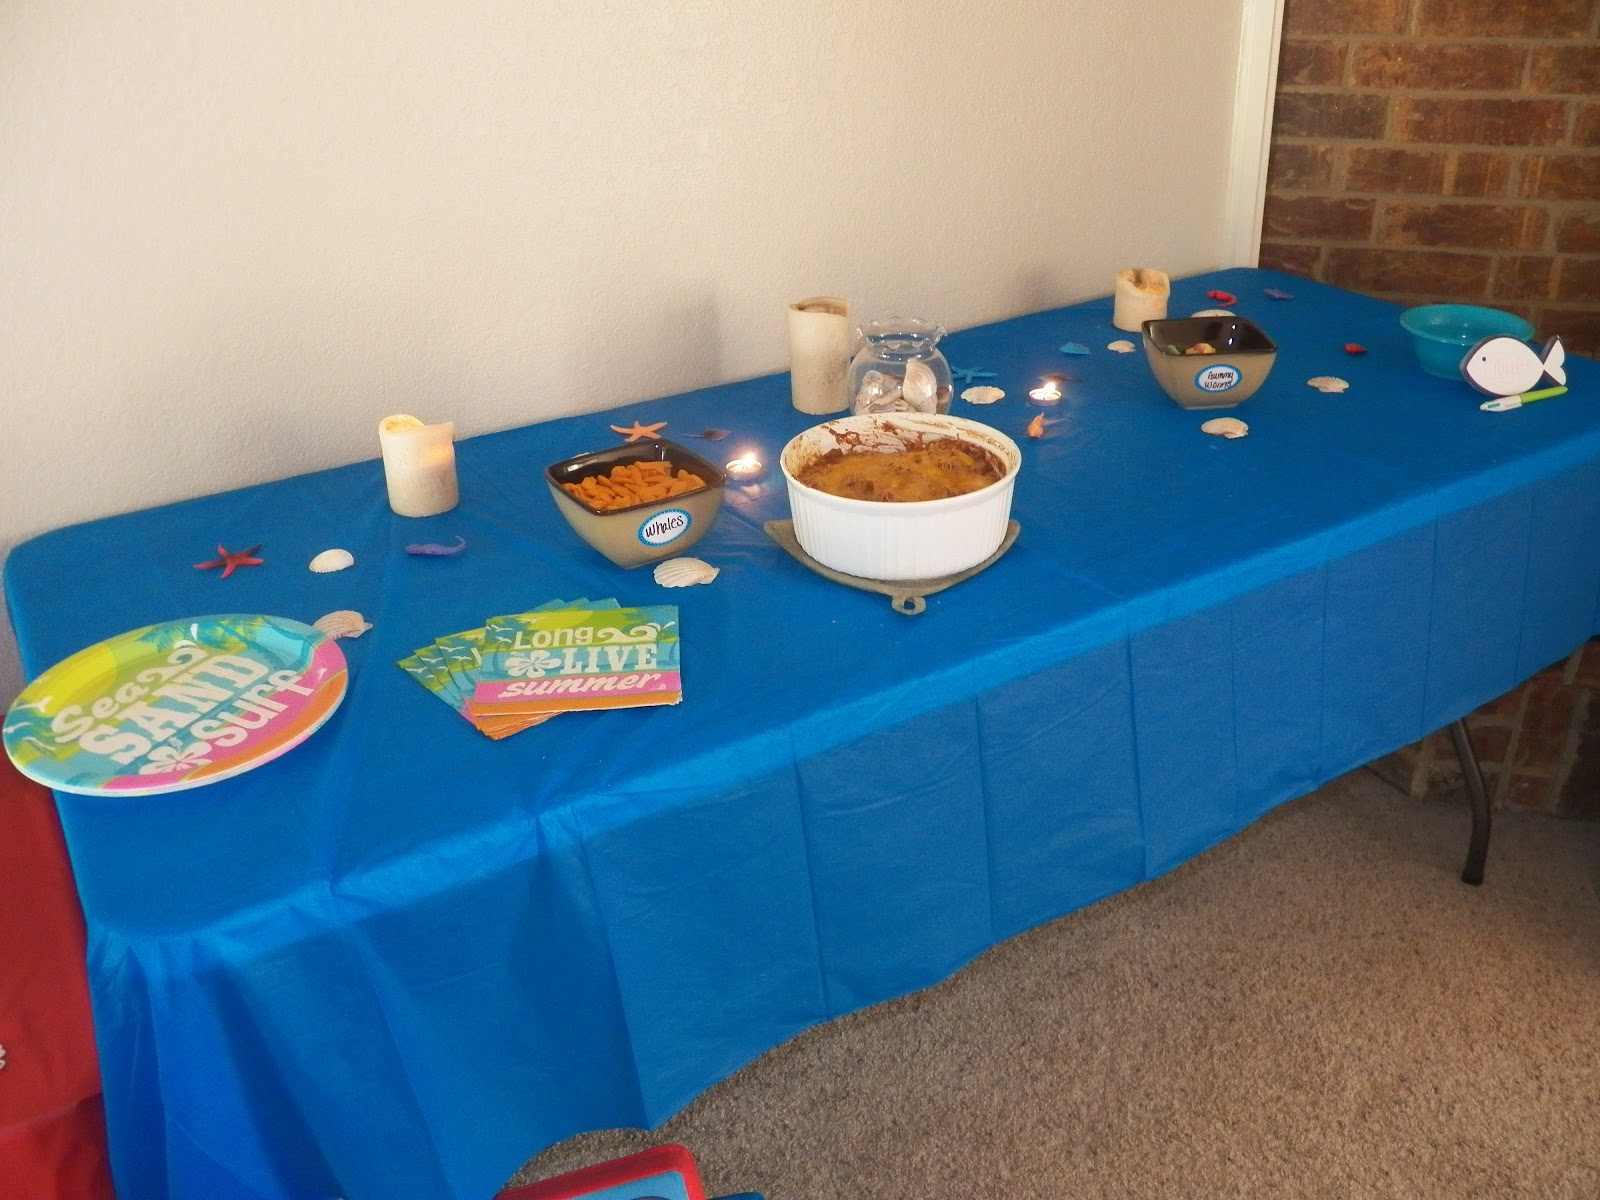
Maddi's Under the Sea table had whales and gummy worms, bean dip, buffalo dip, and chips.  The decor was sand colored candles, light blue tea lights, sea shells and fish, starfish, and sea horses.
We played Mummy Wrap, Charades, and Pass the Hula Hoop.  All the games were a huge hit with the age group (5-9).  All of the games were geared towards the older kids at the party.  I had planned on doing stuff for Brayden and the other young ones, but I didn't get a chance too.

Maddi and another girl were the mummies getting wrapped.

Trying to get the hula hoop around the circle with out letting go of each others hands.

Embarrassed at being the first to go at Charades.
I loved giving both kiddos their own moments in the spotlight.  Maddi opened her presents and then Brayden.  We also sang to them separately.  Even though we combined their birthday parties, I wanted to make sure that both of them had their time to shine.


The kids had a great time, and that is all that matters!!

Want to know how I made the Mickey cookie pops or the ocean wave cupcakes?  Click here.


How to Make Ocean Wave Cupcakes and Mickey Cookie Pops

We had a Mickey Mouse/Under the Sea birthday party for Maddi and Brayden this past weekend, and I made a few items special for the party.

Instead of paying $20+ for a cake made from Wal-Mart, I decided to make cupcakes for both kids.  Ocean waves for Maddi and Mickey Mouse for Brayden, both seen from Pinterest.

The ocean waves were really easy.
All I did was use regular white cake mix, prepared exactly from the box.
After I spooned the mix into cupcake liners, I used a toothpick and blue food coloring to make the swirls.
I dipped the toothpick into the food coloring and swirled it around in the mix till I was happy with how it looked in the cupcake liner.
Then I baked it from the directions on the package for cupcakes.
Then frosted and added sprinkles (per Maddi's request).
Super easy!! 

This is my before picture.  In the setup process, I forgot to take a picture before I frosted.
Here is a close up of the cupcakes and the cake.  I used the same process for the cake.

 After I saw the Mickey pops on pinterest, I knew that I had to make them myself.  They were super easy.

Items needed to make Mickey Pops:

Candy Melts: Red (for pants) and Milk Chocolate (for ears) {From Michaels or Hobby Lobby}
Bag of Lollipop sticks {From Michaels or Hobby Lobby}
Bag of smarties (sort out all the white ones) {Dollar Tree}
Oreos (I think double stuff would work best for pops, I however used regular and they were hit or miss (will explain later))
Bowl to melt red candy {From your house ;)}
Wax or parchment paper to lay oreos on to harden


Here are some of my pops drying before I added their ears

Step 1: Add some red candy melts to a bowl and heat on 50% power for 30 second intervals till melted.

Step 2: Dip half of an oreo in melted red candy.

If Making Pops, Step 3: Stick the lollipop stick into the bottom, through the frosting and squeeze cookie back together.
*This is where I think a double stuff oreo would work better.  I used just regular oreos and the frosting didn't seem thick enough.  A lot of my pops broke or didn't hold together very well once the candy hardened.  I had orginally made 10 or 11, and ended up with 6 on the table.

Step 4: Place cookies on wax paper to harden.  Add 2 white smarties to red candy area for the buttons before it hardens.

Step 5: Let dry.  The longer the better.  I let mine sit over night.

Step 6: Bring some water to a boil to melt the chocolate melt for the ears.  I dipped a little piece of the chocolate into the water till soft (be VERY careful) and pushed it onto the top of the oreo for the ear.  Do twice for each oreo.  Let cool again.

Step 7: Enjoy your Mickey pops or Mickey cookies!

Total Pageviews

LinkWithin

Related Posts Plugin for WordPress, Blogger...
HOME     ABOUT ME     CONTACT     PR WELCOME     30 before 30